- Published on
Windows Server 2016 安裝及設置 OpenSSH
- Authors

- Name
- Rick Jiang
目前公司內的 Windows Server 系統版本大多都是使用 2016 的版本,如果想要使用 PowerShell 來自動安裝 OpenSSH 的話至少需要 Windows 2019 以上,所以這篇文章記錄一下如何在 Windows Server 2016 安裝及設置 OpenSSH
首先先到 https://github.com/PowerShell/Win32-OpenSSH/releases 下載最新版的 OpenSSH,這邊選擇的是 OpenSSH-Win64.zip 接著解壓縮到 C:\Program Files\OpenSSH-Win64

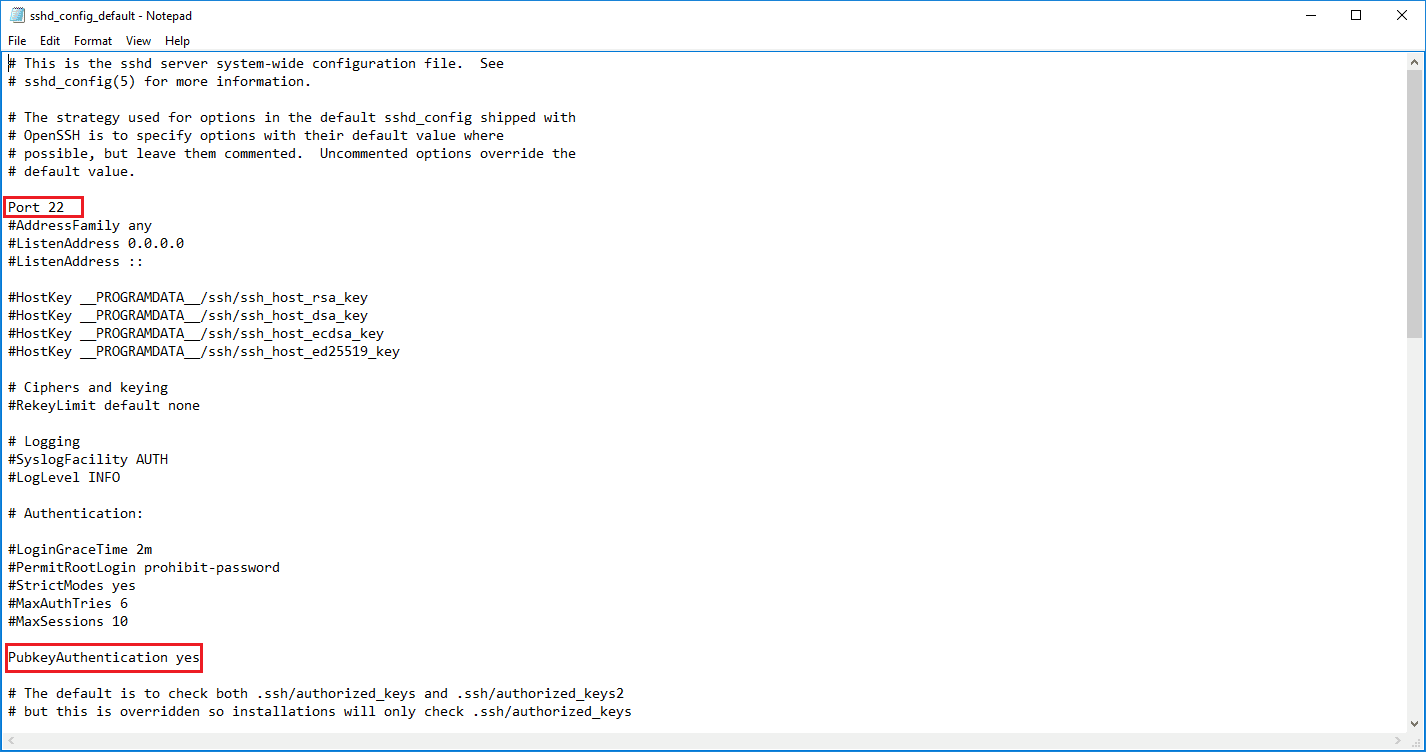
編輯 C:\Program Files\OpenSSH-Win64\sshd_config_default 將 Port 及 PubkeyAuthentication 取消註解

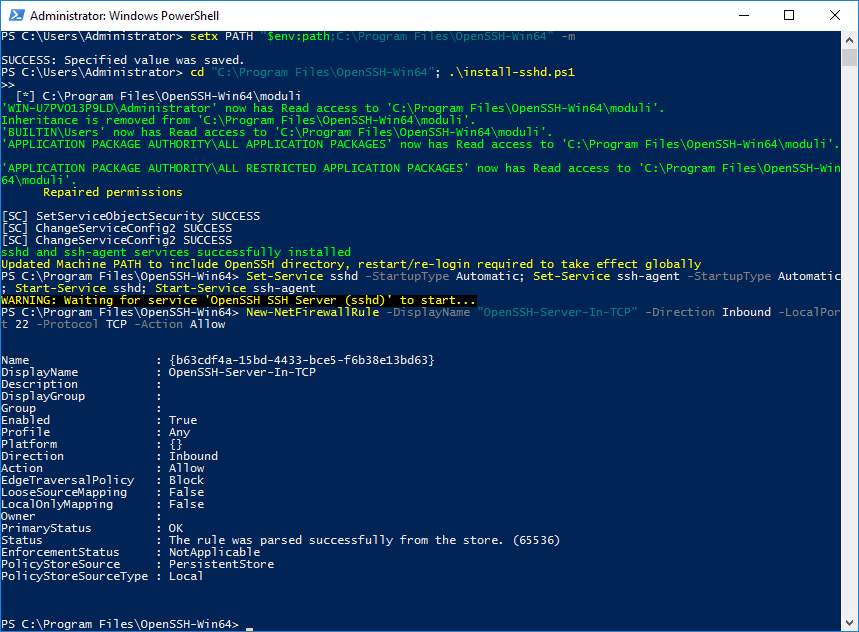
使用管理員身分執行 Windows PowerShell 輸入以下的指令
# 設定環境變數
setx PATH "$env:path;C:\Program Files\OpenSSH-Win64" -m

# 安裝 OpenSSH
cd "C:\Program Files\OpenSSH-Win64"; .\install-sshd.ps1

# 啟用服務
Set-Service sshd -StartupType Automatic; Set-Service ssh-agent -StartupType Automatic; Start-Service sshd; Start-Service ssh-agent

# 開啟防火牆
New-NetFirewallRule -DisplayName "OpenSSH-Server-In-TCP" -Direction Inbound -LocalPort 22 -Protocol TCP -Action Allow

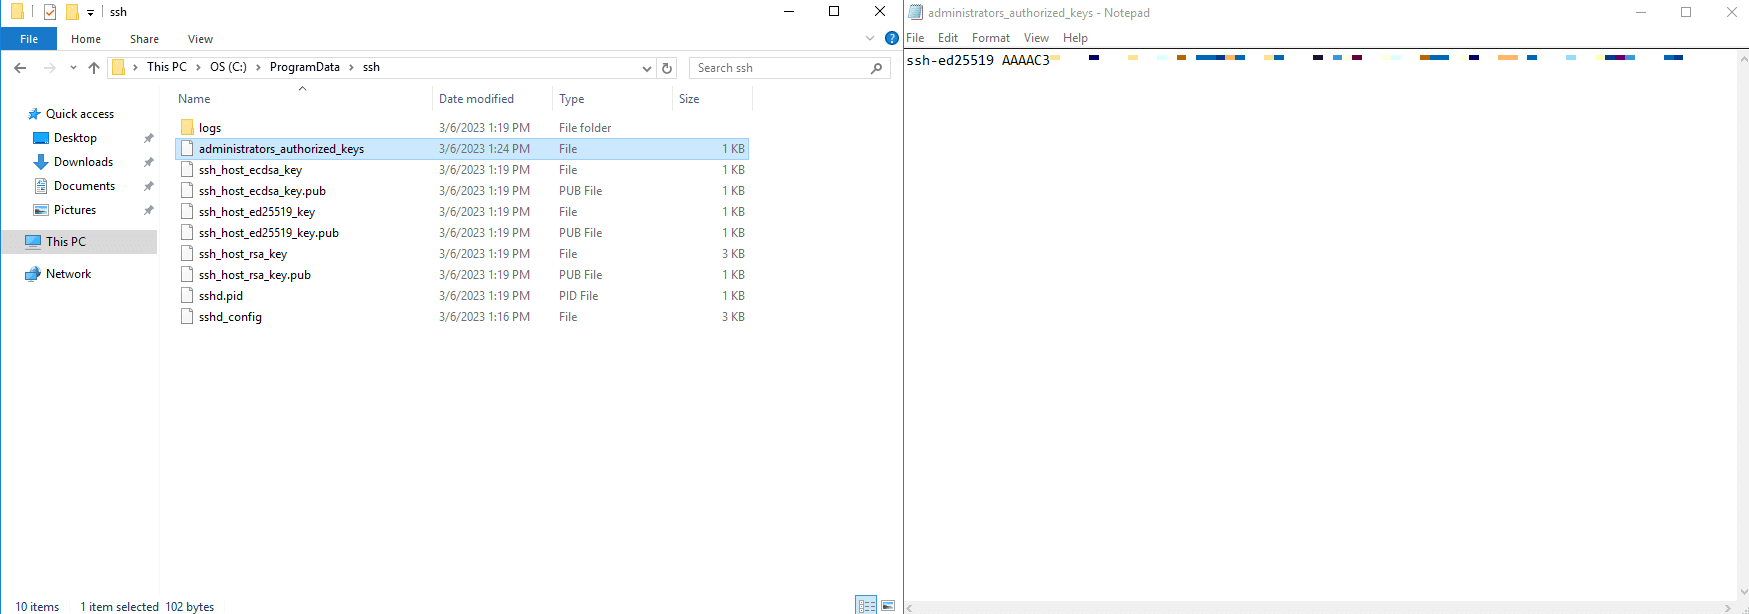
接著將允許登入的公鑰加入到 C:\ProgramData\ssh\administrators_authorized_keys 裡就可以測試連線了
$ ssh Administrator@192.168.123.200